
Safety: Don’t Come Unglued
An accident report filed recently by a PBC member generated the idea for this article. Finding the accident report form on the website is not very intuitive, so here’s the link: Accident Report Form. Individuals should log in to fill out and submit the form, especially those who need “medical attention, even if only RICE (rest, ice, compression, and elevation) …” as well as “ride participants who witnessed the accident.”
 Some of you do all the maintenance and repairs on your bikes. Some of you do some, while others may only fix a flat (a very necessary skill if you’re alone and want to get home for dinner). Some may not even do that and rely on their favorite local bike shop mechanic for everything. But here is one category of maintenance that everyone can and should do: keep all the nuts and bolts tightened appropriately. It might have prevented our member’s unfortunate accident and injuries. ✎

 The accident and injuries occurred when the bike’s rear fender came loose and jammed the rear wheel. No doubt, the bolt securing the fender to the frame vibrated loose until finally falling out completely. Bolts vibrating loose is a common occurrence, and not just on bikes. You might think that the cause is that the bolt was not tightened completely and securely. Certainly, that’s a cause, but even the bolts secured to the correct torque by your highly skilled bike mechanic can and do vibrate loose. Another complication is that bolts can be damaged by excessive tightening so that they eventually fail.
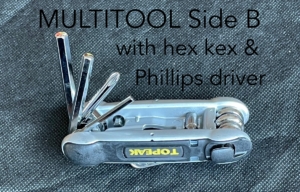
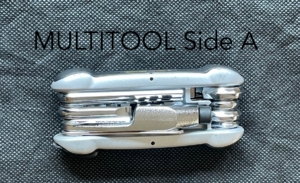
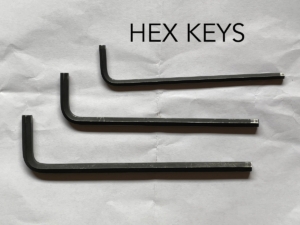
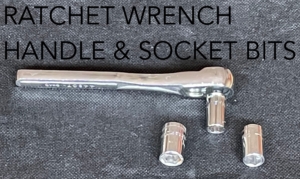
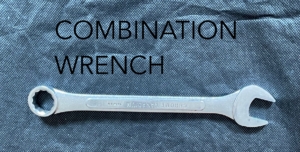
 So, what to do? Get a good set of metric tools, specifically, hex keys a/k/a Allen wrenches, a metric set of combination or open-end wrenches and a multi-tool. Carry the multitool in your bike pack. You should have at least 4mm, 5mm and 6mm hex keys (they will also be on the multi-tool) and wrenches of the same sizes. A ratchet set a/k/a socket wrench with metric (both bolt head and hex key) sockets is also good to have. Don’t rely only on the multitool, which is fine for tightening when you’re on a ride. Double check your tightening with the home tools when you get there. Decent quality hex keys and wrenches are not expensive. You can buy them in sets and in various configurations and handle sizes mostly designed to varying degrees of ease of use.
 You might wonder how to know when you’ve tightened enough without being so tight that there’s a risk of bolt damage, or not tight enough, so that vibration almost immediately starts to loosen the bolt. Well, you can buy a torque wrench (a decent one can be spendy) and you already have the metric bits to go with it because you bought the ratchet set (see the paragraph above) and the drives on the torque wrench handle and ratchet handle are the same size. A torque wrench is highly recommended when installing expensive components or tightening them, and more critically with carbon frames and components.
  Those things can be damaged by overtightening, which proper use of the torque wrench will avoid. There are other complicated ways of accurately calculating proper torque without a torque wrench, neither of which I suspect any of you would do. Your components come with torque specifications for fastening. Some of you may think that you have enough experience to know how much force to use even when tightening on carbon. If you’re inexperienced, don’t wing it.
 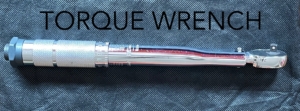 For other things such as fenders and racks, hand tightening will be fine, just be sure to tighten enough but not too much. One way to guess how much pressure to apply by hand with a tool would be to tighten the bolt or nut to the point where you can feel significant resistance, not from the threads themselves, but from the metal surface against which you are tightening the bolt or nut. Then turn the bolt or nut another quarter to half turn.
Now for the easy way to prevent vibrational loosening. Get blue Loctite® or its generic equivalent. It’s easily applied to the bolt threads before starting to thread it into the nut or other receiver threads. (You may have seen bolts in do-it-yourself kits with some now no longer mysterious blue stuff on the bolt threads.) As the name implies, it locks the bolt in place, preventing vibrational loosening. It doesn’t lock it so tightly that you can’t undo it. Loctite® also comes in a red version which does lock it so tight that it is inappropriate for our purposes.
In addition to nuts and bolts, pay attention to quick releases, saddles and seat posts and pedals, problems with all of which I and others have experienced to some degree in our group rides. The seat post: it can be carbon, so observe the cautions already discussed; or metal, and has a quick release, nut and bolt or collar at the top of the seat tube designed to clamp the post securely inside the tube. Usually, a loose hold on the seat post will be gradual until discovered, so less likely to cause an accident. Somewhat more likely to cause an accident is the sudden forward or rearward slant of the saddle. It happened to me and to others on rides I’ve attended. Fortunately, no accident occurred and use of the multitool fixed it. Quick releases: assuming the wheel is properly seated to the frame or the saddle at your preferred height and in line, with the release in the open position, use the “righty tighty, lefty loosey” way of adjusting the lock down such that locking it down requires a moderate amount of force on the lever, the lever makes a noticeable impression on your palm, the lever is not angled outward in the least and, in the case of the wheel, the lever is in line with the chainstay. Pedals: first, understand that “righty tighty, lefty loosey” only applies to the right pedal so, 1) be sure you’re attaching the pedal with the engraved R or L on the correct crank arm; 2) removing and attaching the left pedal is the opposite of normal, i.e., to the left for threading it on and tightening, to the right for loosening and removing; 3) always clean the threads and apply a moderate amount of fresh grease to the pedal threads whenever you attach or re-attach. The pedaling rotation will keep a properly installed pedal securely on the crank arm, so you only need to tighten it to the significant resistance point.
Maybe now after this brief course, some of you will matriculate from local-bike-shop-mechanic-does-everything to do some do-it-yourself bike maintenance.
Alan Mevis, Member at Large & Safety Committee Chair