
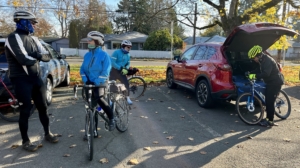
Winter Cycling: How to Ride Safe and Comfy
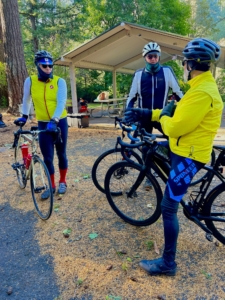 Here are the basic safety tips for safe winter riding.
- Use bike lights on the front and back.
- All brakes (rim or disc) still take more time to stop.
- Leave extra room between you and the rider ahead of you.
- Road marking, wet leaves, and metal expansion joints are slippery.
- Everyone’s (drivers’ and your) vision tends to be reduced in winter.
- Getting out of the house to ride is the first step in safely enjoying winter cycling.
Many people suffer from Seasonal Affective Disorder (SAD) during the winter. The condition is caused by a biochemical imbalance in the brain that can rob you of energy, motivation, and enthusiasm. Physical exercise is one of the best ways to combat it, but often the motivation to exercise is low, creating a vicious circle. ✎
 Even the slightest distraction or reason not to ride can be enough for you to retreat to your warm and dry home. Combat this by making sure all your winter cycling gear is ready the night before. Once you get out the door and onto your bike, pay attention to how you feel. If, after 10 minutes, you’re simply not having fun, change your course to a coffee shop close to home.
PBC is here to help increase your motivation to ride, and social contact is another benefit that can help prevent the down periods. Once you’ve overcome all these motivational obstacles, you need good gear to enjoy the ride. Invest in the best winter cycling clothing because getting cold, wet, and uncomfortable can wash away your motivation.
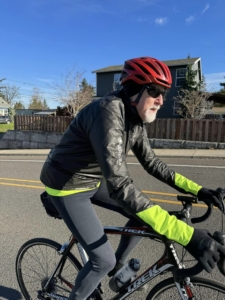
 As we all know, layering is the best way to stay warm. Here are the major components of keeping warm, and tips that make your riding safe and enjoyable.
- A good outer layer: rain cycling jackets should provide wind-stopping and rain protection of your chest and core areas to keep you warm.
- Next to your skin should be a good base layer to keep your body dry. Wool, or breathable synthetic base layers, should be thin so that you can add outer layers over them.
- A good quality thermal layer is worn over your base layer and should work in combination with your base layer and rain cycling jacket.
 Full length bib tights are essential to covering your legs. Most manufactures make basic, thermal, and even water-resistant products that perform very differently.
Your head, hands, and feet should be covered with the best cycling gear you can afford.
On your head you can wear a wool or Gore-Tex cycling hat that can be safely worn under your helmet. A flexible helmet cover keeps heavy rain off your head if you want additional protection. Another option is to combine your under-helmet hat with a neck gator partially pulled up on top of your head that covers your ears. The bottom of the gator can be pulled up over your nose or stop under your chin. There are many winter cycling hats with side tabs to cover your ears.
 There are thousands of winter cycling gloves that advertise to be waterproof or water-resistant. Only a very few keep your hands dry in Portland’s winter weather. To hedge against being too uncomfortable, consider carrying an extra set of gloves to switch out during the ride when the first set is wet. Your hands will love you for it.
 Shoes covers or booties are essential winter cycling gear. Your shoes will get soaked by the water spraying up from your wheels even if you have fenders. Booties are constructed of 3-mm neoprene or Gore-Tex which both offer water protection. Keep in mind that these covers wrap over the top and bottom of your shoes exposing the pedal cleat attachment area. As a result, the bottom of the shoe cover is subject to scraping and tearing when you search to clip in or walk to coffee. On rides this winter, notice how many seasoned riders use duct tape or handstitch their booties back together to extend their life. Shoe covers don’t last forever.
 Regardless of your shoe cover strategy, the goal is to keep your feet warm and cozy. By borrowing a product from downhill skiers, you can help keep your toes comfy. Buy some disposable “toe warmers” that are sealed bags of iron powder, water, salt, activated charcoal and vermiculite that generate heat for up to 5 hours. Open the sealed bag, give them a shake, then place them on top of your toes (outside your wool socks), and you can avoid those numbing frozen toes. The toe warmers are thin enough not to squish your toes with a little adjustment to your shoes’ straps.
Be warm, safe, and upright!
Richard Higgins, Member at Large